
On a shopping trip to Home Depot for spray paint, we found ourselves in the faucet aisle. I have been keeping an eye out for a new kitchen faucet since we bought the house. Wolfy has been hesitant to replace the one we had. Every time I mentioned it, he mentioned how expensive they can be and maybe we should wait awhile. Yet we kept looking.

The one we inherited when we bought had a leaking issue. When you turned it full off (like it was in the before pictures) there was a steady stream of water. So we had to back it off to a precarious half on half off position to make sure there was no water coming out. I was worried we would forget this and turn the water “off” and leave for work and the sink would drip the whole day. Worse yet our sink that likes to clog would not allow the water to escape and would flood the house. It wasn’t a promising idea.

We decided to bite the bullet and buy a new faucet before we left for our weekend away to Virginia, so the pet sitter would not have to worry about our finicky faucet issue. To our surprise we found a nice faucet in brushed nickel for $88 from Glacier Bay. After we got home, we got right down to installing the faucet. Make sure to follow the instructions included in your new faucet. But here are the steps we followed…

Step 1:
Turn off the water. Under the sink we have three water valves; the hot, the cold, and the one for the dishwasher. Wolfy turned off all three. The hot and cold have to be turned off and he turned off the dishwasher water just to be safe.

Step 2:
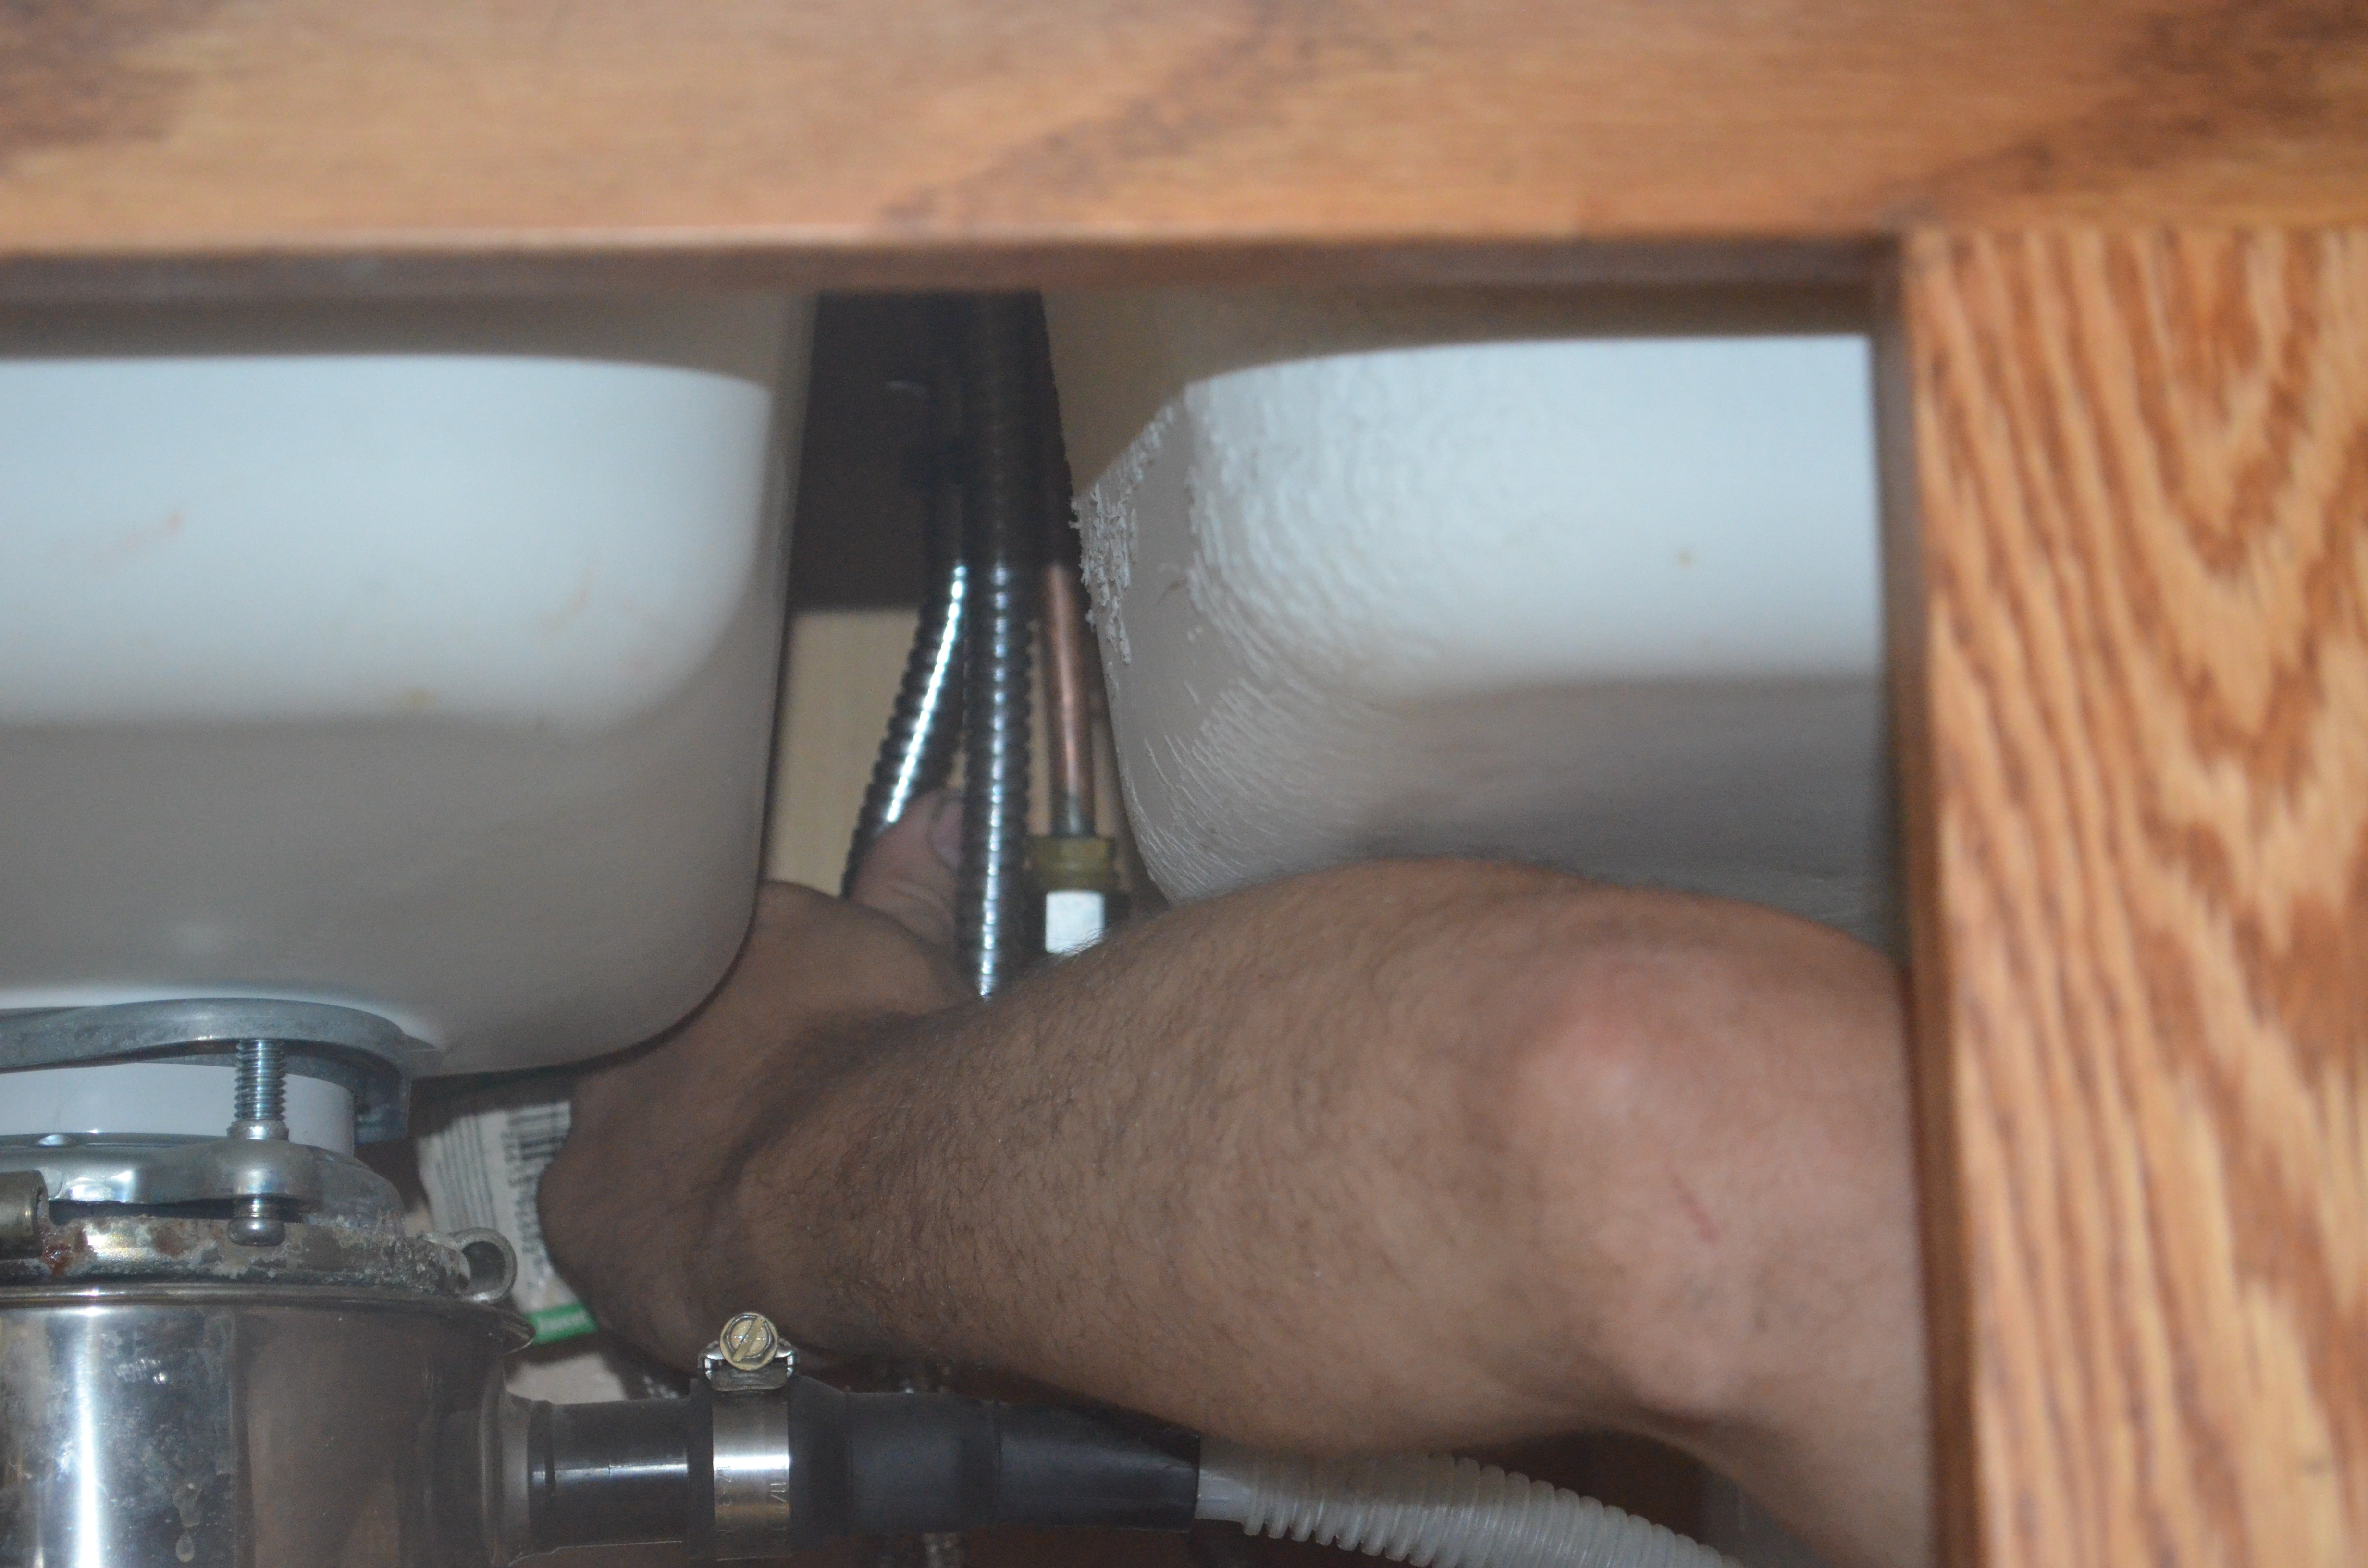
Unhook the water lines. Each line will be hooked up to the copper lines that are in the cabinet and to the faucet itself.
Step 3:
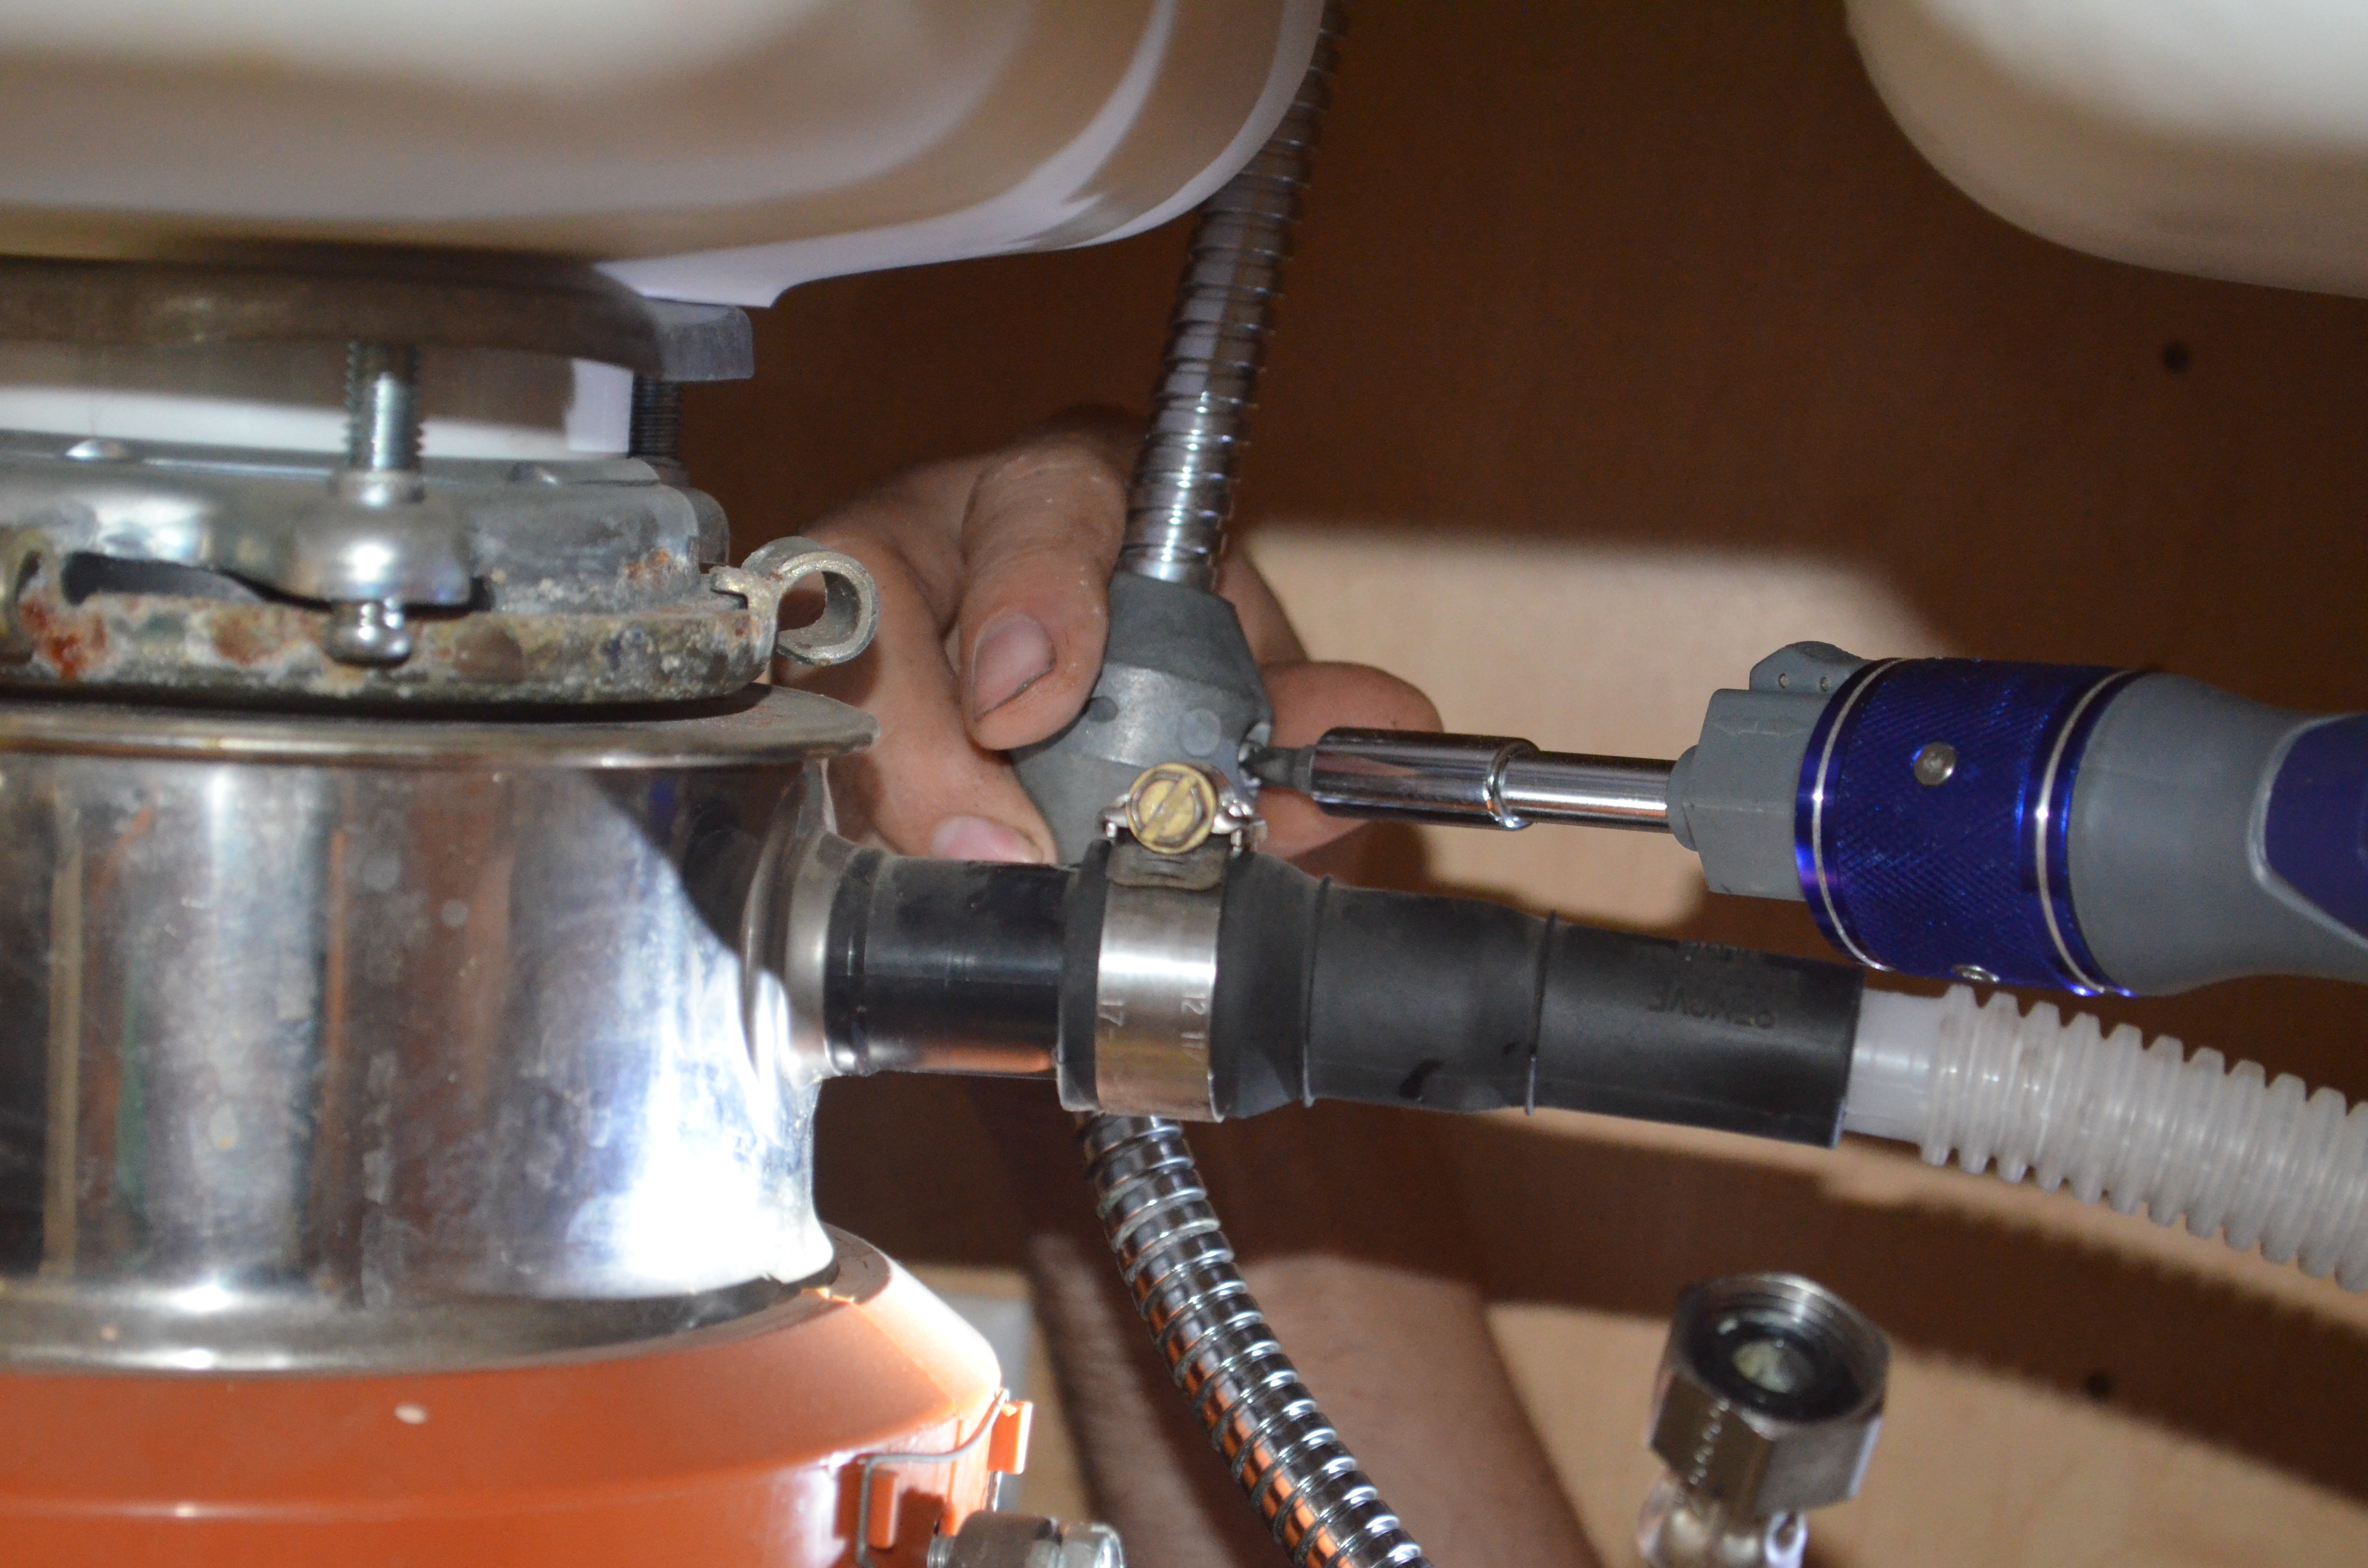
The next step on our list was to remove the weight that allows the pull out faucet to pull back in. Depending on the style you may not have this.
Step 4:
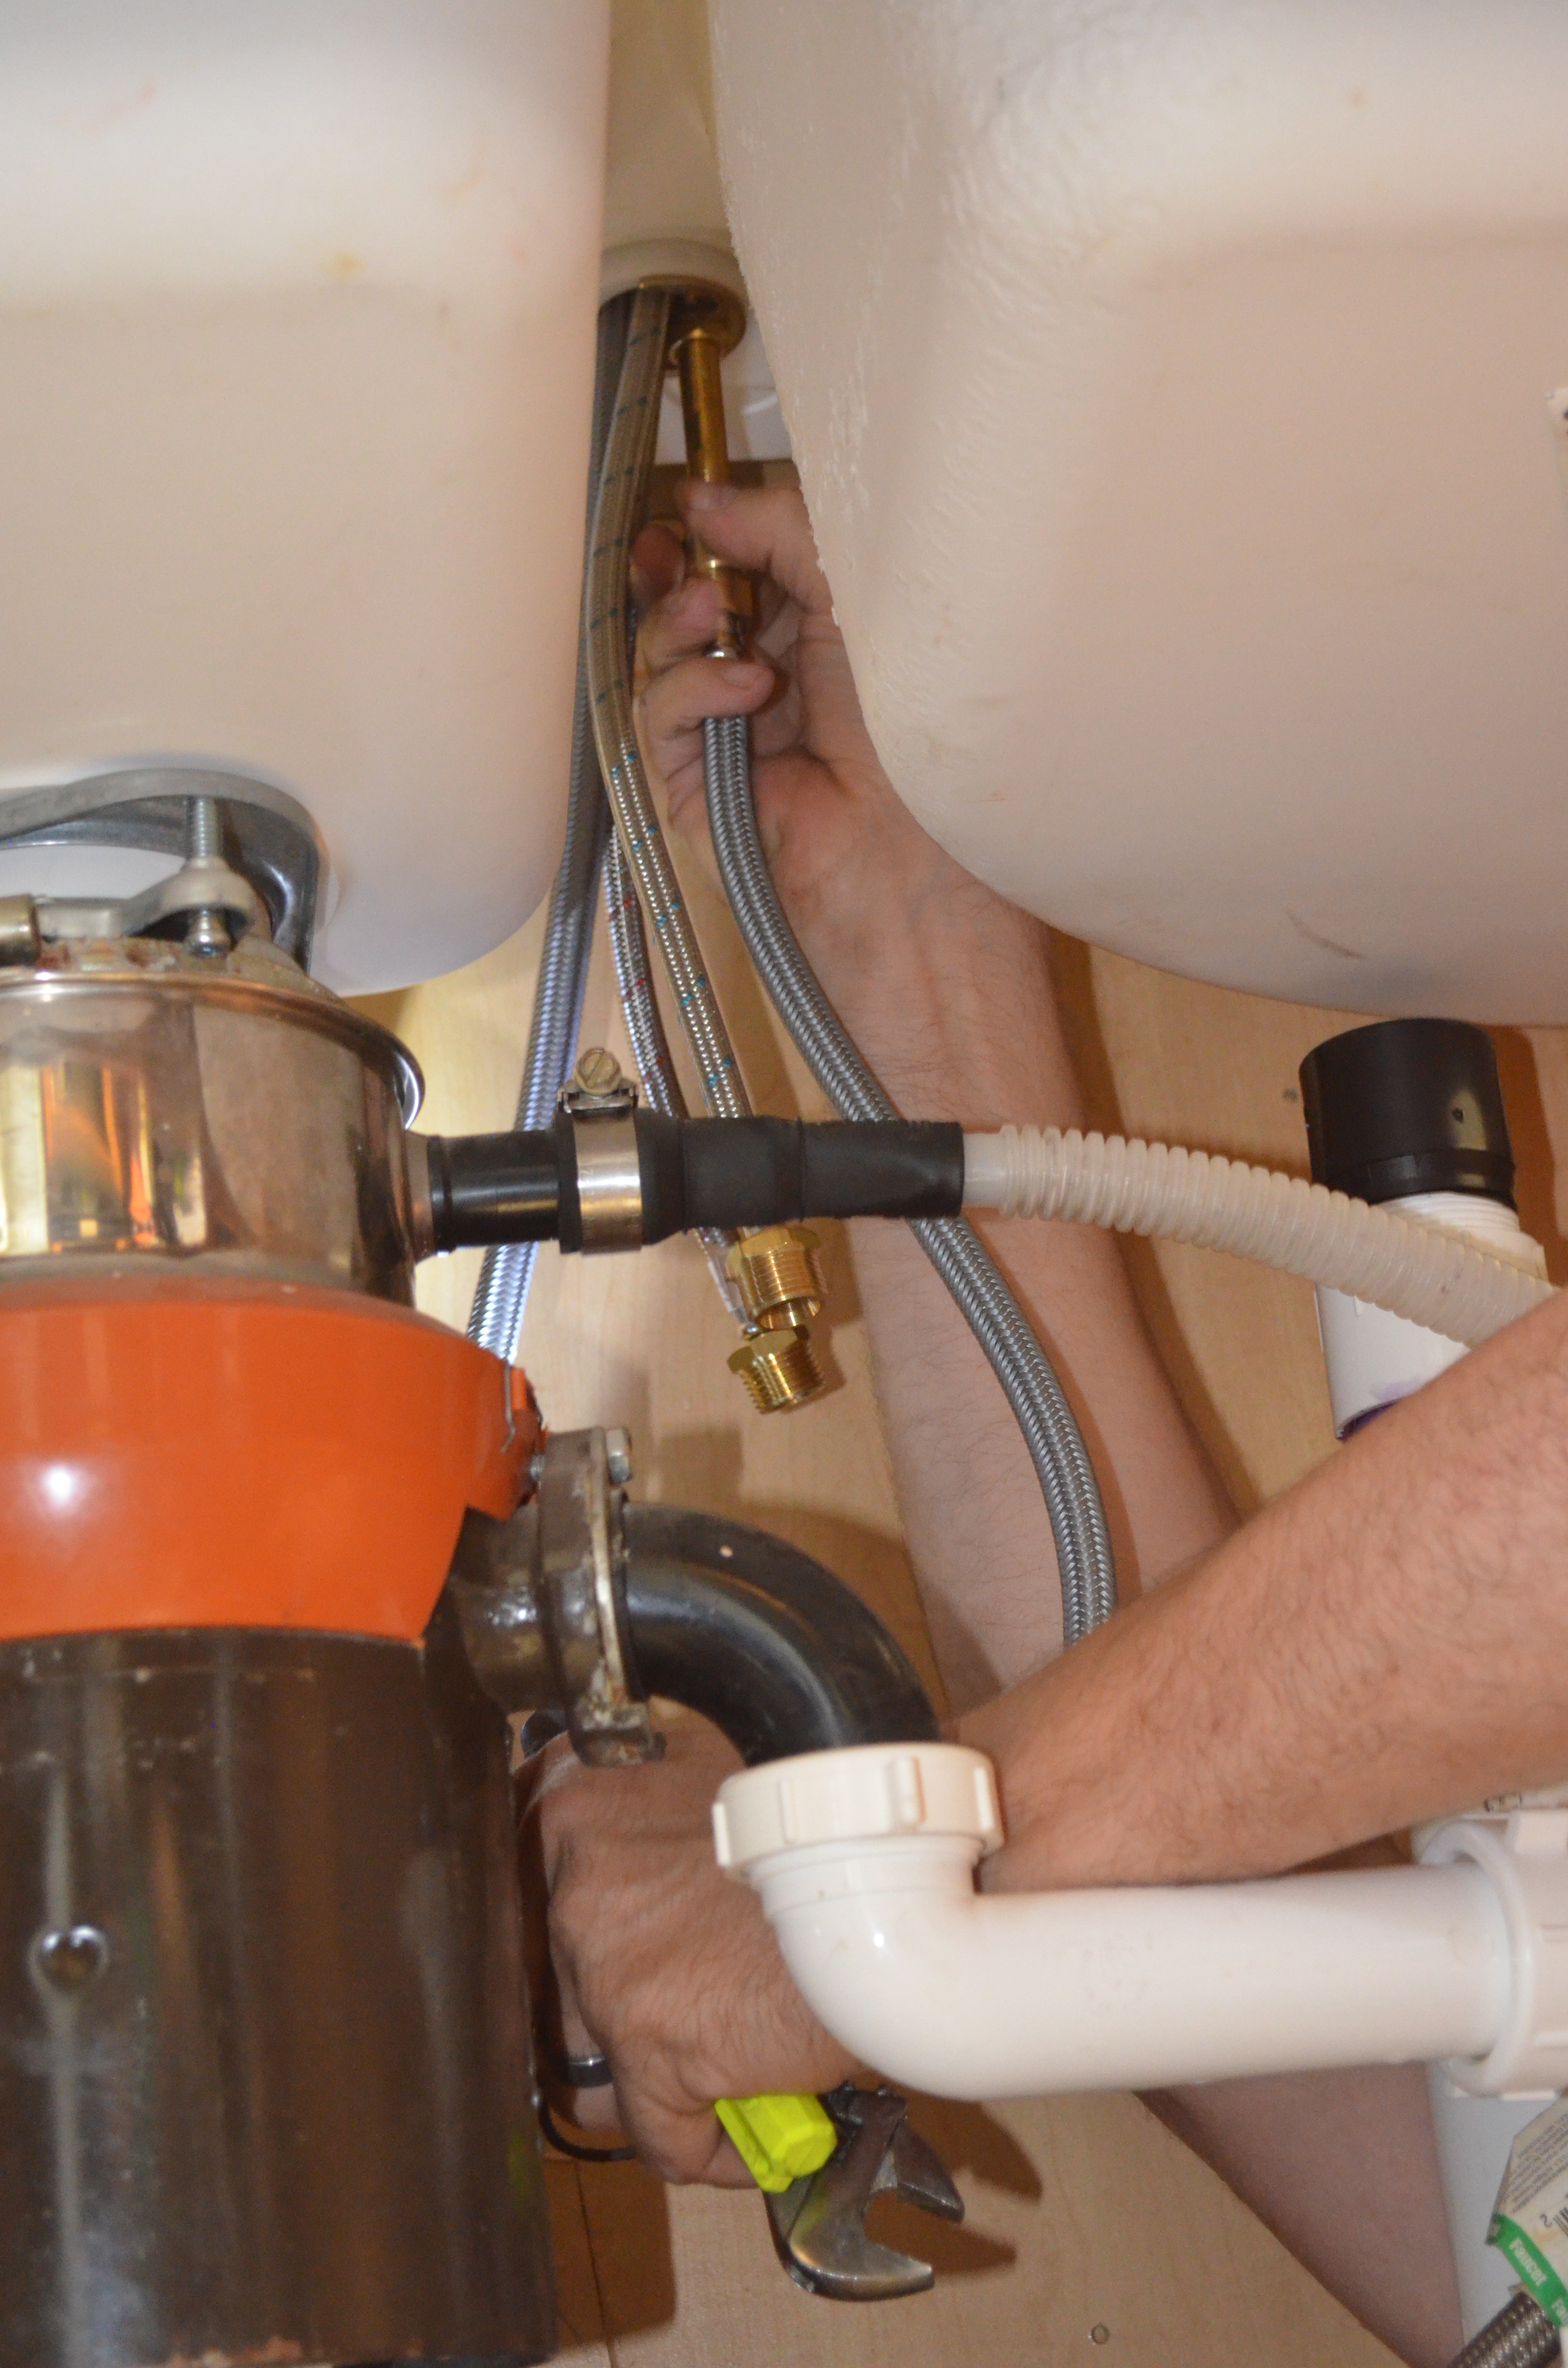
Remove the nut(s) that are holding the faucet to the sink base.

Step 5:
Pull the old faucet out. You are half way there!!!

Step 6:
Remove the o-ring that was under the old faucet and clean the area. You want to make sure any grease or dirt is gone so the new faucet will seal tight.

Step 7:
Set the new faucet in the hole. Line it up (it is helpful to have two sets of hands) and attach the nut(s) underneath the sink base. You want to make sure they are tight enough that you can not move the faucet base but you do not want to over tighten it. Like all o-rings if you over tighten it you can compress the o-ring too much and cause a leak.


Step 8:
Install the new weight.
Step 9:
Attach the water lines. Remember the water lines will need to be attached to the faucet and to the copper supply lines. Make sure the cold and hot lines are attached to the appropriate lines, there is nothing worse than having your cold and hot lines backwards and getting hot water instead of cold. If this happens you will just need to swap them at one end.
Step 10:
Turn your water back on and you are done! We had to tighten the fitting that attached to the pullout faucet on ours but other than that you are ready to enjoy your new faucet.


Previous Posts with details about the kitchen:
Under the Cabinet Storage Solution
I will be linking up here.

July 25, 2013 at 9:05 am
That faucet is gorgeous! We just had to change our bathroom faucet because it would never shut off completely–always dripping. It was only $30–I thought it was going to be so much more too!
July 25, 2013 at 9:09 am
Thank you. There are so gorgeous faucets out there for $200-$300 (and more, cringe) but I am really happy with it. For $80 you can really complain.
July 25, 2013 at 2:29 pm
I love that faucet! It’s very similar to one I’ve been eyeing. I hope to get a new sink and faucet sometime soon. We’re struggling with some drippy issues as well. Loved seeing the step by step to kind of know what to expect when we do!
July 25, 2013 at 3:19 pm
Go for it! It is kind of sad how much happier I am when I go into the kitchen as see that faucet.
July 25, 2013 at 3:09 pm
Neat how much of a difference a new faucet makes. Have you seen a change in your water bill since?
July 25, 2013 at 3:20 pm
If there has been one it hasn’t been huge (I haven’t noticed it). We were very diligent about making sure the water was actually off, because you could get the water to stop running on the old faucets it was just a little bit of a balancing act to find that middle ground.
July 25, 2013 at 5:28 pm
Great do-it-yourself pics! We replaced ours about a month ago because it, too, was leaking. Found out it was so old that we had to use a sledge hammer to get it off!
July 26, 2013 at 12:07 pm
Thank you. Oh no, a sledge hammer. We have only needed those to demo walls. That’s all part of the fun of doing it yourself!
July 29, 2013 at 6:51 pm
Nice upgrade!
August 1, 2013 at 7:47 am
Your new faucet is beautiful. I love the brushed nickel and your instructions, wow…..great detail. I think I could even maybe do this myself with your help. 😉 Have a wonderful day! Love,Wanda
August 1, 2013 at 8:14 am
Go for it!!! Most faucets comes with pretty detailed instructions and then there is also You Tube if you are feeling a little hesitant. I think the hardest thing is getting the nut lose and tight just because you don’t have a huge area to work with.
Pingback: It is time to change the strainer | Our Wolf Den
Pingback: “That’s me in the Spotlight” | Our Wolf Den
August 6, 2013 at 4:25 pm
Such a good how-to! Thanks for sharing! I’d love for you to link up to The DIY’ers! homecomingmn.blogspot.com/2013/08/the-diyers-and-my-new-rug.html
August 6, 2013 at 4:29 pm
Thank you so much. I will be sure to link up, thank you for letting me know about it!
Pingback: New Blinds in the Kitchen | Our Wolf Den
Pingback: Replacing the Overhead Florescent Light in the Kitchen | Our Wolf Den
Pingback: Concert Countertops | Our Wolf Den
September 20, 2013 at 8:37 pm
Superb blog! Do you have any recommendations for aspiring writers? I’m planning to start my own site soon but I’m a little lost on everything. Would you recommend starting with a free platform like WordPress or go for a paid option? There are so many options out there that I’m totally confused .. Any ideas? Appreciate it!
September 20, 2013 at 9:19 pm
Thank you for your kind words. My advice is… write!!! I would get a free platform first. Clearly I personally prefer wordpress but there are others out there. Once you figure out if you like it and want to pay for it then you can. I am at the point right now were I am debating when would be a good time to go to a paid platform, but I know I am not quite ready yet. It is free and you are only out your time. Let me know if you need anymore help!